Concrete resurfacing made easy is not just a dream, but a reality. Imagine transforming your worn-out concrete surface into something brand new, or even better. In this step-by-step guide, we will walk you through the process of concrete resurfacing made easy.
Key Takeaways
- Concrete resurfacing is a cost-effective and versatile solution for repairing and enhancing concrete surfaces by providing an extensive selection of design options, and lasting between 8 and 20 years.
- Proper surface preparation is critical for successful concrete resurfacing, involving cleaning the concrete, repairing any serious damage, and following specific mix and application techniques for the resurfacer.
- Curing and maintenance are essential to the longevity of resurfaced concrete, requiring at least 24 hours before foot traffic, and regular cleaning and sealing for enduring durability.
Understanding Concrete Resurfacing

Concrete resurfacing is a way to refinish old concrete to look new again. Instead of completely replacing the concrete, consider concrete resurfacing as an alternative. By overlaying a new surface onto your existing concrete, you can refresh and rejuvenate your current concrete surfaces in a cost-effective and versatile way, with prices ranging from $2 to $8 per square foot. The result is a rejuvenated surface that can last between 8 and 20 years, making it a worthwhile investment.
Concrete resurfacing products offer a wide range of design, color, and texture options. Whether you prefer the rustic charm of the Seamless Stone finish or the varied colors of the Polished Stone finish offered by the X-Bond range, there is a style to suit every taste.
The recommended thickness of the resurfacer depends on the product chosen, usually ranging from 1/4 to 1/2 inch for pre-blended mixes and 1/8 to 1/4 inch for micro toppings.
Benefits of Concrete Resurfacing
Concrete resurfacing offers several benefits, including:
- Revamping your current concrete
- Enhancing durability and safety
- Improving visual appeal
- Prolonging the surface’s lifespan
- Addressing issues like cracked concrete
- Creating a stronger and more resilient surface.
Concrete resurfacing also substantially enhances safety. Many concrete resurfacing products come with slip-reducing additives that can enhance safety by improving traction and reducing the risk of slipping accidents. This provides a non-slip surface that enhances grip and stability, particularly in wet or slippery conditions, making it an ideal choice for driveways, patios, and walkways.
When to Choose Resurfacing
While concrete resurfacing is a powerful tool in the home renovation arsenal, it’s not a magic wand that can fix all kinds of concrete damage. It is most suitable for addressing minor cracks and surface imperfections, as well as repairing damage such as sunken concrete and problematic concrete structures.
However, if your concrete surface has severe damage or structural issues, such as underlying soil movement, significant structural problems, or issues with expansion joints, resurfacing may not be the solution you need.
Before opting for resurfacing, assessing the extent of the concrete damage is necessary. Here are the steps to follow:
- Investigate the cause of the defect
- Measure and record the dimensions of cracks and joint spacing
- Document with photographs
- Seek professional advice.
This approach will help you make an informed decision on whether a concrete resurfacing product is the right solution for your project to resurface concrete and address any concrete repair needs.
Essential Tools and Materials

ust like any home improvement project, concrete resurfacing requires the right tools and materials. The major manufacturers of concrete resurfacing products typically combine:
- Portland cement
- Fine sands
- Polymer modifying compounds
- Additional additives
This creates a mixture that can be applied over existing concrete slabs to create a new, durable surface.
The tools you’ll need for a concrete resurfacing project include:
- Concrete resurfacers
- Trowels
- Squeegees
- Brooms
- Edgers
Each of these tools plays a crucial role in the resurfacing process, from the application of the resurfacer to the creation of texture and finishing touches. Choosing appropriate tools and materials is a significant step toward the successful completion of your concrete resurfacing project.
Choosing the Right Resurfacing Product
Selecting the appropriate resurfacing product can greatly impact the result of your project. There are a variety of options available for concrete resurfacing, including:
- Overlays
- Coatings
- Stains
- Sealers
Your choice will depend on the desired finish, the condition of your existing concrete, and the level of durability you require.
The base colour for a concrete resurfacing project can be chosen from options such as ivory, white, and grey offered by Overcrete Concrete Resurfacing Compound.
These base colours can be mixed with powder tints containing high-quality pigments to attain the preferred final hue. If you’re working in cold or night-time conditions where slower drying is anticipated, consider using an Overcrete Accelerator to expedite the drying time.
Preparing the Surface for Resurfacing

Correct surface preparation lays the groundwork for a successful concrete resurfacing project. Before you even open a bag of concrete resurfacer, you need to ensure your existing concrete surface is clean and free from any loose debris, oil stains, or old paint. This allows the resurfacer to form a strong bond with the existing concrete, ensuring a durable and long-lasting result.
Apart from cleaning, it’s also important to repair any serious damage on your concrete surface before resurfacing. This includes:
- Patching up any cracks or pits using a suitable concrete patching product
- Ensuring it’s completely dry before proceeding with the resurfacing process
- If you have any control joints on your concrete surface, protect them with duct tape during the resurfacing process.
Cleaning the Surface
Cleaning up the concrete surface is important when preparing for resurfacing. A high-pressure hose is recommended for this task, as it can effectively remove stains, dirt, and debris from the surface. If you have any old paint on your concrete surface, it’s advisable to use a paint stripper to remove it before applying the resurfacer.
Sometimes, you may encounter stubborn stains like oil or tree sap on your existing concrete surfaces.
- For oil stains, dish soap can be an effective solution. Let it sit on the stain for a while before scrubbing it off.
- For tree sap, you can use a cotton ball dipped in acetone-based nail polish remover or rubbing alcohol.
Repairing Damaged Areas
Once your concrete surface is clean, the next step is to repair any damaged areas. Examine your concrete surface carefully to identify any cracks or pits that need to be repaired before resurfacing. There are different products available for this purpose, including:
- Concrete patching compound
- Concrete repair mortar
- Concrete resurfacer
- Epoxy-based patching compound
The procedure for repairing cracks involves cleaning the area, chiseling out the damaged concrete, undercutting the crack (if it’s wide), filling it with the repair material, smoothing it out with a trowel or squeegee, feathering the edges, and allowing it to cure.
To prevent future cracks, avoid overworking the concrete, cure the repair carefully, use control joints, prepare and compact the base properly, and add reinforcements such as steel mesh or fiber.
Mixing and Applying the Resurface
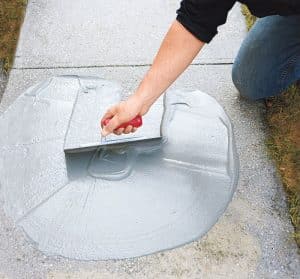
After preparing the surface, it’s time to mix and apply the resurfacer. The key to achieving a smooth and even finish is to mix the resurfacer to the consistency of syrup. This is usually achieved by adding approximately six pints of water to one 40-pound bag of resurfacer. Once you have the right consistency, pour a small amount of the mix onto the surface and start spreading it evenly with a light, long-handled squeegee.
It’s important to work in small sections, especially if you’re new to resurfacing. Here are some guidelines to follow:
- The recommended maximum area size for working is 144 square feet at a time
- The working time at 24C/73F is approximately 20 minutes
- If you want to ensure comprehensive coverage of minor imperfections, you might want to consider applying a second coat, but this is ultimately optional.
Mixing the Resurfacer
Achieving the correct consistency for your resurfacer mix is essential for a fruitful resurfacing project. The ideal conditions for mixing concrete resurfacer involve working in favourable weather conditions with temperatures of at least 10C/50F and ensuring the area to be resurfaced is clean and free of debris.
To achieve the appropriate consistency of your resurfacer mix, gradually add water and mix thoroughly until you have a smooth and creamy texture resembling pancake batter. If necessary, adjust the consistency by adding more water or resurfacer powder.
For optimal results, mix and apply one bag at a time. The advised quantity of water to combine with an 18 kg bag of resurfacer is 2.8 litres.
Application Techniques
The application of the resurfacer is a skill in itself. The method you use to apply the resurfacer can significantly influence its durability and appearance. To achieve a uniform finish, simply pour a small amount of concrete resurfacer onto the surface. Then, use a light, long-handled squeegee to promptly spread it evenly.
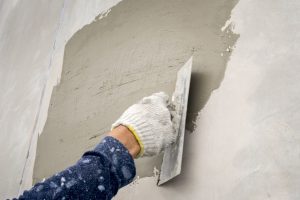
If you prefer using a trowel, remember it requires more manual effort and time, but it gives you precise control over the thickness of the application. Whether you choose to use a squeegee or a trowel, remember to work in small, manageable sections to maintain consistent quality.
Adding Texture and Finishing Touches
After applying the resurfacer, texture and finishing touches can be added to improve the visual appeal and functionality of the resurfaced concrete. This may involve using a textured roller to achieve a rocky finish or applying a polymer-modified overlay for a decorative layer. The type of texture you choose can vary widely, from fish scale to diamond tile, basketweave, herringbone, flagstone, cobblestone, and more.
Apart from texture, you might also want to consider adding colour to your resurfaced concrete. This can be done by integrating concrete colouring agents into the mixture prior to application, offering a diverse selection of customisable colour options to complement your design preferences.
Remember, the cleanliness of the concrete surface, the tools and techniques used, and the time allowed for drying and curing are all crucial factors in achieving a resilient and polished texture.
Creating Texture
Adding texture to your resurfaced concrete can provide a distinctive appearance and texture. There are several tools you can use to create texture, including:
- Stamped concrete mats
- Seamless skins
- Rollers
- Brooms
- Trowels
The texture process should commence when the resurfacer is in a slightly wet state, typically within a few minutes to an hour after application.
There are also different methods you can use to incorporate decorative finishes into the wet concrete resurfacer, such as:
- Using stencils
- Adding colour
- Patterned or fleck spraying
- Employing hand-laid paving techniques to create patterns or designs.
If you’re using a broom to create texture, try running it in multiple directions to produce various decorative effects.
Perfecting Edges
Refining the edges of your resurfaced concrete can impart a professional appearance. For this, you’ll need a concrete edger, which is a slender tool designed for refining the edges of a concrete slab. The edges should be consistent to ensure a clean and precise edge.
To achieve smooth and polished edges, apply the resurfacer to the edges and borders within the initial 10-15 minutes of application using a concrete edger. If you encounter minor bumps or imperfections, you can use handheld grinders to remove them.
Remember, the success of edging your resurfaced concrete lies in:
- Using the correct tools
- Setting the right depth for the edger
- Avoiding common errors such as not adequately preparing the ground or choosing inappropriate edging materials.
Curing and Maintaining Resurfaced Concrete
After the substantial effort of resurfacing your concrete, you’ll want to make sure it endures for a long time. That’s where curing and maintenance come in. Adequate curing and maintenance are crucial in ensuring the long-term durability and longevity of resurfaced concrete.
After the resurfacer has been applied, it’s important to allow it to cure properly. Here are some guidelines to follow:
- Wait at least 24 hours before allowing light foot traffic on your newly resurfaced concrete.
- If you’re planning to drive vehicles over the surface, wait at least three to five days to ensure it has adequately cured.
- Remember, the curing time can be influenced by factors such as temperature and humidity, as well as the inclusion of specific products like calcium chloride.
Curing Timeframes
After the resurfacer has been applied, it needs to cure before you can start using the surface. The standard minimum curing time for foot traffic is at least 24 hours. However, if you’re planning to drive vehicles over the surface, you should wait at least three to five days to ensure it has adequately cured.
The curing process can be influenced by a range of factors, including temperature and humidity. Lower temperatures can slow down the curing process, while higher temperatures can lead to rapid drying. Higher humidity levels can help maintain moisture, thereby facilitating proper curing.
Maintenance Tips
When your resurfaced concrete is completely cured, maintain it to guarantee its durability. Regular sweeping with a soft-bristled broom and periodic wet mopping with mild soap and water can help to preserve the cleanliness of your resurfaced concrete.
In addition to regular cleaning, you should consider sealing your resurfaced concrete every 2 to 5 years to maintain its durability. If you notice any minor damage, such as small cracks or pits, repair them promptly using a high-quality concrete patch product. By following these maintenance tips, you can help ensure that your resurfaced concrete stays in good shape for many years to come.
Summary
In conclusion, concrete resurfacing is a cost-effective and versatile way to rejuvenate worn-out concrete surfaces. From understanding the concept of resurfacing, choosing the right materials, preparing the surface, to applying the resurfacer and adding textures, each step is crucial to the success of your resurfacing project. Proper curing and maintenance ensure the longevity of your newly resurfaced concrete, making it a worthwhile investment in your home renovation project.
