Have you ever contemplated transforming the drab, weather-worn concrete surfaces in your yard into a captivating space? Perhaps you’ve been deterred by the daunting task of concrete removal or the high costs associated with such large-scale projects. What if there was a solution that could refresh your existing concrete surfaces without the need for extensive demolition or preparation?
Enter DriBond, a revolutionary dry bond concrete overlay solution that offers an efficient and cost-effective way to install pavers or stones over existing concrete surfaces.
Key Takeaways
- DriBond is a versatile and easy-to-use concrete overlay solution that bonds pavers or stones to existing concrete surfaces without the need for extensive demolition, providing a fast, durable, and cost-effective way to transform outdoor spaces like driveways, patios, and pool decks.
- Preparation is crucial for a successful DriBond application, involving thorough cleaning, repairing cracks and damages, and evaluating surface slope and drainage to ensure the foundation is ready for the overlay.
- DriBond is compatible with various hardscape materials including natural stone, porcelain tiles, and clay pavers, offering flexibility in design. For a successful application, one must ensure proper activation with water, address elevation point differences, and use BorderBond for installing border pavers.
Understanding DriBond Concrete Overlay
Fundamentally, DriBond revolutionises the realm of concrete overlays. This advanced dry mud set was specifically developed to bond pavers or stones to existing concrete surfaces, eliminating the need for extensive demolition or preparation of the old concrete surface.
What sets DriBond apart, however, is the simplicity of its application. Imagine being able to transform your concrete driveway or patio in under 48 hours! Moreover, DriBond’s impressive shelf life and durability make it a reliable solution for various concrete overlay jobs, from patios and driveways to walkways and pool decks.
What is DriBond?
Simply put, DriBond serves as a smooth, hassle-free solution for concrete overlay projects. This specialized dry mud set consists of a liquid primer and a grout additive that combine to form a robust adhesive for your choice of pavers or stones. When applied over existing concrete surfaces, DriBond fills in the cracks and seams, creating a stable bedding surface.
Comparable to a thin set adhesive for tiles, it establishes a firm bond, fastening the pavers or stones to the pre-existing concrete base. The result? A durable and attractive finish that breathes new life into your already preexisting concrete surfaces and structures.
Benefits of using DriBond
Beyond its transformative capabilities, DriBond offers a wealth of additional advantages. Notably, it eliminates the cost of concrete removal, which can be quite hefty. This makes DriBond a cost-effective solution for overlay projects, such as:
- a concrete driveway
- a patio
- a pool deck
- a walkway
Moreover, DriBond sets like concrete when activated with water, creating a durable bond. This eliminates the need for extensive labor-intensive preparation work, making DriBond a time and labor-efficient choice for concrete overlays.
Lastly, thanks to its advanced dry polymer mud set, DriBond offers enhanced durability to the preexisting concrete surface and pavement, making it resistant to various weather conditions.
Types of projects suitable for DriBond
DriBond is a versatile solution that works well for a diverse array of projects when you’re thinking of revamping your:
- patio
- driveway
- walkway
- pool deck.
DriBond can do the trick. With its ability to set like concrete when activated with water, DriBond makes the installation of thin concrete pavers almost a breeze. This characteristic makes it well-suited for overlaying concrete surfaces and creating visually appealing outdoor living spaces with long-lasting durability.
So, no matter what type of project you’re planning, DriBond can be your go-to solution for a swift and efficient transformation.
Preparing Your Existing Concrete Surface for DriBond Application
Before embarking on your concrete overlay project with DriBond, proper preparation of the existing base concrete surface, including the existing concrete substrate, is necessary. This involves cleaning the existing concrete surface, repairing any cracks or damages, and evaluating the surface slope and drainage. Each of these steps is crucial in ensuring the successful application of DriBond, as they collectively contribute to the establishment of a solid foundation for your concrete overlay project.
Cleaning the surface
Attaining a clean and moisture-free concrete surface is crucial for DriBond to bond effectively. This is where professional stain removers and high-duty surface preparators come into play. By using these products, you can effectively clear away any greasy residue, organic stains, or rusty marks that could potentially interfere with the bonding process.
It’s also important to remember that DriBond requires a completely dry surface for optimal adhesion. So, make sure to allow ample time for the surface to dry after cleaning, especially if you’re using a high-pressure washing technique.
Repairing cracks and damages
Over time, concrete surfaces tend to crack and sustain damage. However, these imperfections don’t have to stand in your way of a successful DriBond application on existing dry concrete surfaces. You can address these issues by using a cement-based patching compound or a concrete patching product to fill in any larger and wider cracks.
In the case of minor cracks, you can directly apply the DriBond dry mix. Just remember to let the repair materials dry completely before proceeding with the DriBond application. This way, you ensure a smooth and even base for your overlay project.
Evaluating surface slope and drainage
Assessing the surface slope and drainage, although often overlooked, is a critical step in readying your concrete surface for a DriBond application. A poorly sloped surface can lead to water accumulation, which can compromise the integrity of the DriBond overlay. To prevent this, ensure there is at least a 2% slope for proper drainage.
Also, conduct a drainage test by wetting the slab to prevent water pooling. Following these steps will not only protect your DriBond application from potential damage but also prolong the lifespan of your overlay.
DriBond Installation Process
Following the proper surface preparation, you’re now ready to apply DriBond. The installation process is straightforward and can be completed in under 48 hours, which means you can witness the transformation of your space in no time. The process involves spreading DriBond, levelling with a screed tool, and finally, laying your choice of pavers or stones.
So, let’s delve into these steps one by one to better understand how to go about your DriBond application.
Spreading DriBond
The first step in the DriBond installation process is spreading the product. This involves:
- Opening the bags
- Pouring the DriBond over your prepared concrete surface
- Spreading the dry mix
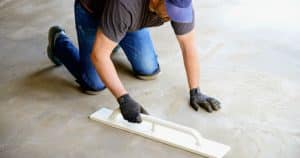
- Utilising a screed tool to guarantee uniform coverage.
The screed tool is instrumental in achieving a flat and even finish, making it an essential tool in your DriBond application process.
Levelling with a screed tool
After spreading DriBond, the subsequent step involves levelling. This is where the DriBond screed tool comes in handy. The screed tool allows you to level the product to a recommended depth of 3/8”, ensuring an even layer of DriBond across your surface.
Remember, levelling is crucial for a successful application as it provides a stable bedding surface for your pavers or stones.
Laying pavers or stones
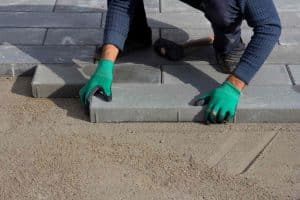
Having evenly spread and levelled the DriBond, you’re set to place your pavers or stones. This step requires attention to detail to ensure proper alignment and spacing.
Once you’ve placed the pavers or stones on top of the levelled DriBond, you need to activate the DriBond with water. If rain is imminent, be sure to cover the area with a waterproof cover or delay the application if heavy rain is predicted.
Compatibility of DriBond with Various Hardscape Materials
One of DriBond’s most notable characteristics is its compatibility with diverse hardscape materials. Whether you prefer natural stone, porcelain tiles, or clay pavers, DriBond can bond your chosen material to your existing concrete surface.
This compatibility offers a great deal of flexibility in design and aesthetic options, allowing you to create a space that truly reflects your aesthetic preferences.
Natural stone
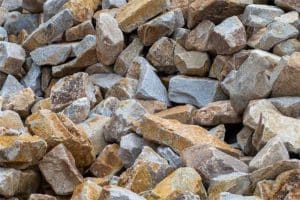
Natural stone offers a timeless and classic look that can elevate the aesthetics of any outdoor space. With DriBond, you can overlay your existing concrete with natural stone such as polished marble or granite, enhancing the visual appeal of your space without compromising on durability.
Porcelain tiles
If you’re looking for a sleek and modern look, porcelain tiles may be your perfect match. DriBond works excellently with porcelain tiles, offering a robust adhesive bond that withstands time and weather.
With DriBond, you can create a sophisticated look that requires minimal maintenance. For more information, refer to the DriBond technical data sheet.
Clay pavers
For those who prefer a more rustic and traditional look, clay pavers are an excellent choice. DriBond is compatible with clay pavers, making it easy to install these charming and durable pavers over your existing concrete surfaces.
With DriBond, you can enjoy the classic appeal of clay pavers, along with the durability and strength of a concrete overlay.
Tips for Successful DriBond Application
For a successful DriBond application, there are some helpful pointers to bear in mind. These include properly activating DriBond with water, handling elevation point differences, and installing border pavers using BorderBond.
Following these tips will not only ensure a smooth application process but also result in a durable and visually appealing concrete overlay job.
Properly activating DriBond with water
A crucial step in the DriBond application process is the activation of the product with water. It’s important to lightly tap a few pavers with a hammer after laying them to ensure full activation. Then, you can spray water over the pavers to activate the DriBond, allowing it to harden and set like concrete for a strong and durable bond.
Remember to use the recommended amount of water for the most effective outcomes.
Handling elevation point differences
Addressing differences in elevation points on pre-existing concrete surfaces is critical for a successful DriBond application. Elevation differences can lead to uneven surfaces and potential trip hazards. Therefore, it’s essential to address these differences before applying DriBond.
This could involve cutting or chiseling the pre-existing horizontal concrete surfaces to adapt concrete slabs to the existing concrete surface slope. Choosing thinner pavers for the overlay can also help minimise increasing the slab’s elevation too much, thus maintaining the installation’s stability.
Border paver installation with BorderBond
When installing border pavers, using BorderBond, a liquid fortifier, can offer optimal binding. The application of BorderBond involves:
- Preparing the concrete surface
- Applying a layer of DriBond concrete overlay
- Placing border pavers along the edges
- Applying BorderBond to the joints and allowing it to dry as per the manufacturer’s instructions.
This ensures a robust bond between the border pavers and the DriBond overlay, enhancing the overall aesthetics and stability of your space.
DriBond in Different Weather Conditions
DriBond is engineered to endure diverse weather conditions. However, the application process may require some tweaks based on the weather conditions at the time of installation. Factors like humidity, rainy weather, and cold temperatures can impact the DriBond application process.
Therefore, it’s important to understand how to navigate these conditions to achieve a successful application.
Humidity considerations
Though humidity is typically seen as a hurdle in concrete overlay tasks, it doesn’t present a significant issue with DriBond, as long as the product is properly activated with water. However, it is still crucial to consider the potential impact of humidity on the drying and curing process.
High humidity levels can slow down the drying process, leading to longer setting times, while low humidity can cause water to evaporate too quickly, potentially affecting the bonding and overall performance of the product.
Rainy weather precautions
Rain can present a complication to the DriBond application process. It is crucial to ensure that the surface is thoroughly dry prior to application. In the event of anticipated rain, it is advisable to consult the weather forecast and schedule the application during a dry period. If rain is imminent, you can shield the area with a waterproof tarp or plastic sheeting.
If heavy rain or prolonged wet weather is predicted, it is best to delay the application.
Cold weather installations
Even amidst cold weather, DriBond maintains its effectiveness. However, the chemical reactions of DriBond may slow down in cold weather, resulting in:
- prolonged curing and setting times
- reduced hydration rate
- extended setting and curing times
- elevated viscosity of DriBond, making application more difficult.
Despite these challenges, DriBond can still be used effectively in cold weather by following the recommended practices and considering the weather conditions.
Maintaining and Caring for Your DriBond Concrete Overlay
While a DriBond concrete overlay is designed for longevity, consistent maintenance and care can prolong its prime condition for many years. From cleaning and maintenance to repairing damaged areas and protecting the surface with sealers, each of these steps plays a vital role in preserving the appearance and integrity of your DriBond concrete overlay.
Cleaning and maintenance
Frequent cleaning is key to preserving both the appearance and durability of your DriBond concrete overlay. Biodegradable lithium concentrate concrete cleaner and Kemclean are recommended products for maintaining DriBond concrete overlays.
Depending on the level of foot traffic and exposure to weather elements, cleaning frequency may vary. However, a good rule of thumb is to clean the overlay as needed to maintain its appearance and functionality.
Repairing damaged areas
With time, signs of wear and tear may appear on your DriBond concrete overlay. Promptly addressing any damage not only prevents it from worsening but also extends the lifespan of your overlay. Visible cracks, de-lamination, or movement are signs that repairs are needed.
With DriBond mud set, repair mortar, and patch anchors, you can effectively repair damaged areas and restore the look and function of your overlay.
Protecting the surface with sealers
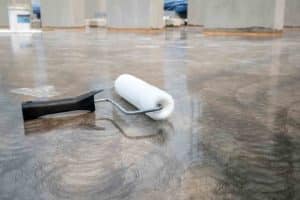
Applying a sealer can boost both the durability and aesthetics of your DriBond concrete overlay. Sealers form a protective film on the surface that inhibits water absorption and surface abrasion, and helps maintain the overlay’s aesthetic appeal. It’s recommended to apply a sealer every 1-2 years for optimal protection.
So, whether you’ve just completed a DriBond application or have had one for a while, a sealer can offer that extra layer of protection to keep your overlay looking great.
If you’re pondering over a DriBond concrete overlay for your area, you may be curious about the potential outcome. From overlaying existing concrete with porcelain pavers to creating bedding surfaces for thin pavers, DriBond has been used in a variety of applications. You can find before and after photos of real-life DriBond projects on the Techniseal website.
These examples can give you a better idea of what to expect from a DriBond application and can serve as inspiration for your own project. For more detailed information, refer to the product’s technical data sheet.
Summary
DriBond has truly revolutionised the world of concrete overlays. With its compatibility with various hardscape materials, ease of application, and cost-saving benefits, DriBond offers a convenient solution for transforming existing concrete surfaces. Whether you’re planning a patio makeover, updating your driveway, or revamping your pool deck, DriBond can help you achieve your vision with ease and efficiency. So, why wait? Transform your paving today with top-quality DriBond concrete overlay solutions.
Want more information about Dribond paver overlays? Book a no-obligation call with one of our experienced team now!
